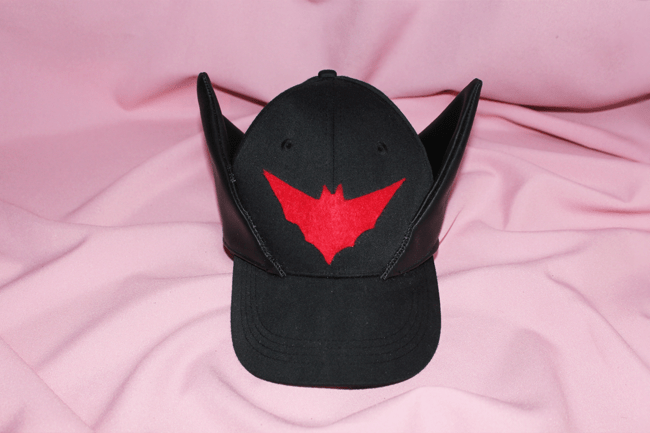
When Ant Lucia’s Bombshells designs were first revealed, I vowed to bring the line of retro redesigns to life! It’s been a year in the making, but I finally whipped out my arsenal of crafts to create Batwoman’s Gotham Knights uniform point of fashion: her hat!
Perfect timing if you ask me since it was just announced that the Bombshells will be taking over again this summer! So, join me for this simple tutorial and you too can make your very own hat. It doesn’t hurt that it’ll cost you around $10!
High frugal five!
What you’ll need:
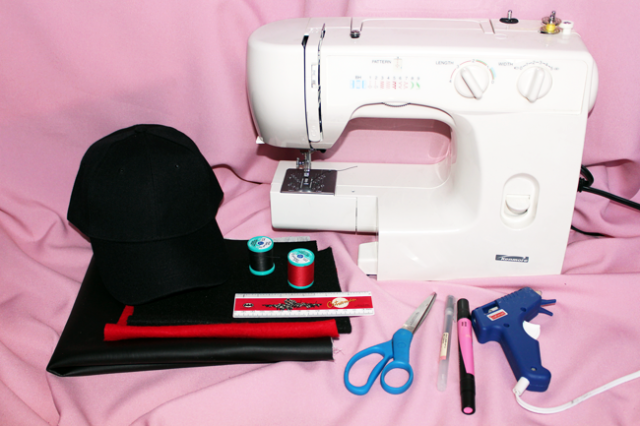
• Black Baseball cap, $3.00, Michaels Crafts
• Red and black thread, $2.00, Michaels Crafts
• Red and black felt, $0.33 each
• Black Pleather, $5 half a yard
• Scissors, Ruler and Scotch tape
• Marker, Pen and Paper
• Sewing Machine
• Hot glue gun and glue sticks
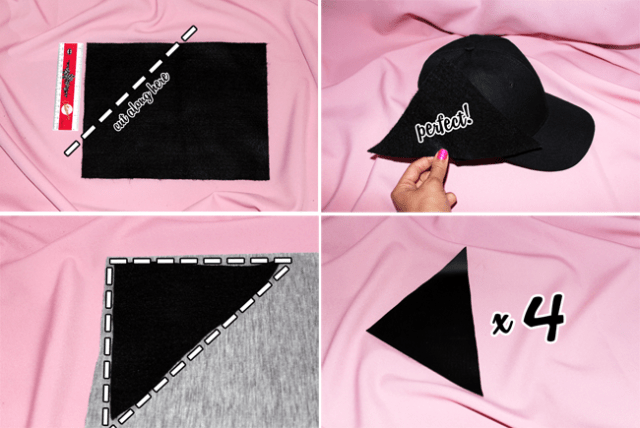
Step 1: Make your pattern
We need to find out how tall and wide we want our bat ears to be! I found that measuring down a little over 6 inches on the felt (faced horizontally) and cutting across worked best!
Step 2: Measure and make adjustments
After cutting out your pattern, place it on the side of your hat to see if it is what you always dreamed of.
Step 3: Trace your pattern
Flip your pleather fabric on to its “wrong side” (the side that won’t be shown) and place your felt pattern on top, so you can trace the outer edges. Repeat this step four times until you have four identical ear panels.
Note: You can continue to use the felt or move on to black pleather or whatever black fabric you have laying around. I decided to use the black pleather.
Step 4: Cut out your pattern
Follow the outlines and cut out each shape. You should have four identical ear panels.
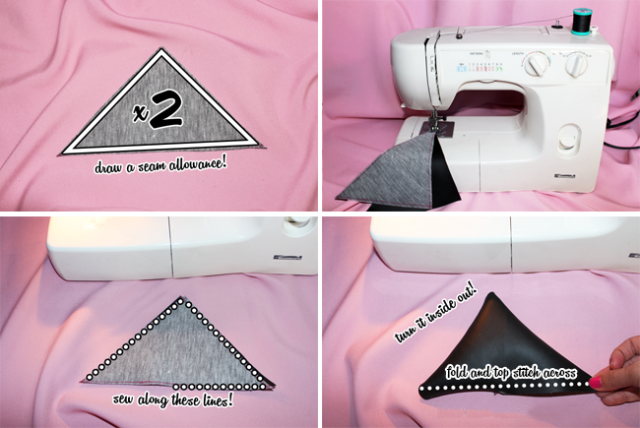
Step 5: Add Seam allowance
I figured 1/4 of an inch would be good and measured that on all three sides of each panel. Your cutting doesn’t have to be perfect-perfect, but your seam allowance has to be as close to perfect as you can. You will be following this line while sewing. Add a seam allowance to two panels.
Step 6: Prepare your sewing machine
Add in your black thread and bobbin because we’re about to get to the fun part start sewing! You’re going to take one pair of ear panels– One will have the seam allowance markings and the other won’t. Place them “good side” to “good side”–This means the “good sides” are sandwiched by the “bad sides” (shown above)
Make sure they are perfectly aligned! You’re only going to sew the two side panels together, but only half way across the bottom panel. No more.
Step 7: Follow the lines
Sew along the left and right sides of the triangle, but only sew HALF of the bottom side. The empty half will allow you to reach in enough to pull the fabric and turn it inside out. It’ll look a little something like above.
Admire your clean edges for a bit before you do this entire step again to your other pair of ear panels.
Step 8: Keep following the lines
You’re going to fold in the not sewn portion to match the other half and them top stitch the entire bottom. It should look a little something like the photo above. It’s okay if it’s sloppy, because life isn’t perfect and you’ll going to look super cute in this hat!

Step 9: Repeat!
Repeat steps 5 through 8 so you can have two bat ears! Phew–we are almost there!
Step 10: Make your logo pattern
Let’s take a break from the ears and let’s work on the emblem. Trace the image of her logo onto a piece of paper or free hand it if you’re feeling fancy. After confirm that it is the size that you want, cut it out!
Step 11: Cut out your pattern
Place the pattern over your red felt or fabric of choice to trace and cut that out!
Step 12: Gather your supplies
At this point you should have two bat ears and one emblem! Trim up any imperfections and plug in your hot glue gun because it’s time to glue!
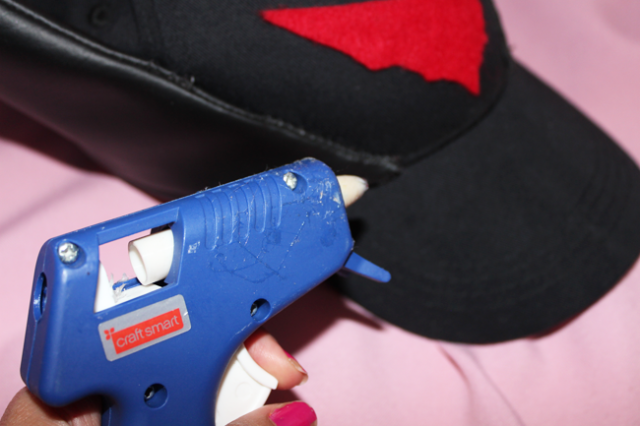
Step 13: Glue! Glue! Glue!
When gluing, make sure you glue the emblem on the center of the hat! As for the ears glue them onto the sides of the cap! Whatever the glue can’t do or to correct any mistakes, just hand stitch it! Works like a charm!
Aaaaaaaand you’re done! All that’s left is to take a bunch of well-deserved selfies with your new hat!
Jessica is a blogger, craftswoman and pink-cladded brat-girl headquartered in NYC. You can find her collection of adventures, comic reviews, and more of her DIY tutorials over at her blog, The Crazy Bat Lady.
—Please make note of The Mary Sue’s general comment policy.—
Do you follow The Mary Sue on Twitter, Facebook, Tumblr, Pinterest, & Google +?