Facebook‘s new profile layout, Timeline, was announced yesterday, but it won’t make its way to the public for a few days. Developers get access to the new feature early though. If you saw the announcement and were immediately upset that you weren’t a developer, it’s an easy fix; you can become a “developer” in a matter of minutes and play with Timeline right away.
You see, Facebook decides who developers are based on whether or not a given account has “developed” and app. What does that mean? It means you put an app out in the world. Does it have to have a logical name, downloads, or even any code? No. It just has to be. As soon as that app exists, you can hop right in and play with Timeline. Only other “developers” (and actual developers) will be able to see your new profile until the changes go live, but you can make sure it’s just right when that happens.
Instructions after the jump.
- You have to have a verified account to do this, meaning you have to give Facebook a credit card or phone number. If you haven’t done that already, you’ll be prompted to do so at some point in the process.
- Get the Developer app. Just type “Developer” in your Facebook search bar and select “Developer” the app (not the group). It should have about 100,000 users listed

- Install it. Click “allow” and give it all the permissions it asks for.
- Get into the Developer app. This should happen automatically. If not, you can just repeat step one and it’ll take you in.
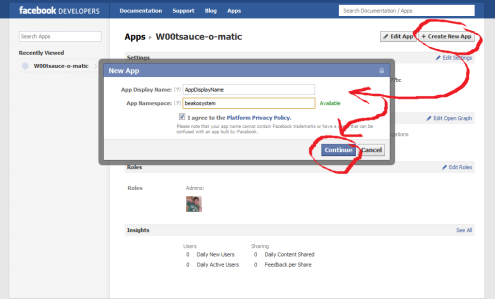
- Click “Create New App.”
- Fill out the dialog box. Nothing you put here matters. Hit “Continue.”

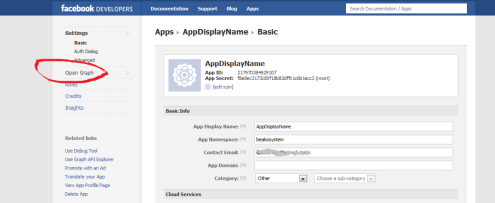
- You should be on your new app’s page. Go to the left-hand tool bar. “Settings” should be selected. Underneath its sub-options there should be an option “Open Graph.” Click that.

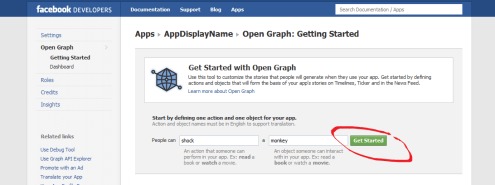
- Here it will ask you to describe an object for your app. “In your app, people can [verb] a [noun].” Again, all that matters is that this is filled out. Pick something random or something that amuses you. Hit “Get Started.”

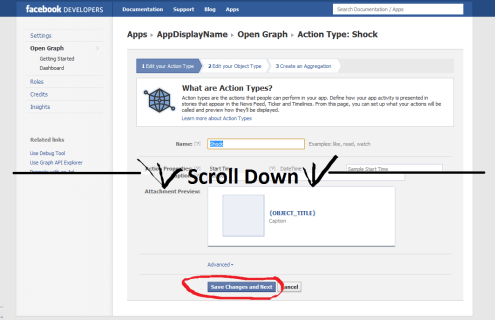
- Scroll down to the bottom of the next page. Hit “Save Changes and Next.”

- Repeat step 8 on page 2. (Scroll down and click.)
- Scroll down and click one more time. This time the button should say “Save and Finish.”
- Wait a few minutes for good measure, then hop back to your homepage and there should be a Timeline invite waiting for you at the top of the page.
- ????
- Profit.
(Method by Techcrunch, via Business Insider)


Published: Sep 23, 2011 11:15 am